
Congratulations to all who are able to read this! Our species is rightfully the crown of creation and is at the top of the food chain! How did we achieve this?
Overview of the resilience and resourcefulness of ancient survival techniques
One of the main pillars of our success is that already in the Stone Age we had a sharp mind and ingenuity. Seriously, in those bearded times we could even do dental fillings! And what is important, thanks to our extraordinary intelligence, we became professional survivalists, inventing a lot of survival techniques in the wilderness that allowed us to adapt to any conditions and live almost anywhere.
Fire-Making Techniques
Let’s start perhaps with the most important of survival skills – it is making fire! There were times when people didn’t know how to make fire and had to wait for lightning to strike a pine tree, for example, and then use that flame to start a tribal fire. But then our ancestors worked hard and invented a couple of effective methods of how to start a fire:
Friction-Based Methods
Friction-based fire-making techniques rely on creating heat through the friction between two materials. There are several types of friction fire-making methods, each varying in difficulty and materials. The most common friction-based techniques are:
Bow Drill Method
Materials:
- Bow: A flexible stick with a cord (often made from plant fiber or animal sinew) tied between the ends.
- Spindle: A straight, dry stick (usually wood) that rotates within the socket.
- Socket: A piece of wood or stone that holds the spindle in place as it spins.
- Fireboard: A flat, dry piece of wood on which the spindle rotates.
- Tinder: Dry, fine material like moss, dry grass, or bark to catch the ember produced.
Process:
- The bow is used to rotate the spindle rapidly against the fireboard.
- The friction between the spindle and fireboard creates heat, which eventually produces a small ember.
- The ember is carefully transferred to tinder, where it is nurtured until it grows into a flame.

Hand Drill Method
Materials: A spindle and a fireboard are the main tools for the hand drill method.
Process:
- The spindle is placed in a notch of the fireboard.
- By rapidly spinning the spindle between the palms of the hands, friction heats up the contact area, producing an ember.
- The ember is then placed into tinder to start the fire.
The hand drill method is considered more challenging than the bow drill because it requires greater skill and stamina to generate enough friction.

Fire Plough
Materials: A hard, straight stick (often wood) and a dry, softwood board.
Process:
- A fireboard is prepared with a groove or furrow in it.
- The fire plough (a hard stick) is dragged along the groove.
- The friction generates heat, causing the material in the groove to smolder and produce an ember.
- The ember is transferred to tinder to start the fire.
This method is less commonly used than the bow drill or hand drill but can be effective when done properly.

Pyrite and Flint Striking
Flint and pyrite (or other similar stones) striking is another ancient survival skills bushcraft, relying on sparks to ignite tinder.

Pyrite and Flint Method
Materials:
- Flint: A hard, siliceous rock capable of producing sparks.
- Pyrite: An iron sulfide mineral that can be struck with flint to produce sparks.
- Tinder: Dry materials like char cloth, grass, or small pieces of bark to catch the spark.
Process:
- Pyrite is struck against the flint at an angle, causing small pieces of the pyrite to break off and spark.
- The spark lands on the tinder, which, if dry and prepared correctly, catches the spark and begins to smolder.
- The ember is gently blown on until it catches fire and can be used to ignite kindling.
Flint and Steel
Materials:
- Flint: A sharp-edged stone that can create sparks.
- Steel: A piece of high-carbon steel (often a striker), which, when struck with flint, produces sparks.
- Tinder: Materials like char cloth, dry grass, or cotton can catch the spark.
Process:
- The steel is struck against the flint with force, causing sparks.
- The sparks land on the tinder, and if prepared properly (especially if the tinder is charred or finely shredded), they will ignite.
- The ember is then blown into flame.
Pyrite and Steel
Similar to flint and steel but using pyrite as the striking material. When pyrite is struck against steel, it also produces sparks, which can ignite tinder. This is a very reliable method, particularly when flint is not available.
Key Points for Both Methods:
- Dry Tinder: No matter which technique is used, having dry, finely prepared tinder is critical for success. Natural tinder like dry grass, bark, or moss can work well, but you can also use charred material, which is easier to ignite.
- Skill: Friction-based methods require practice and stamina. The bow drill is easier than the hand drill, but both require technique to create enough friction to generate heat. Flint and pyrite striking techniques are more forgiving in terms of physical effort but require good tinder preparation.
Foraging and Identifying Edible Plants
Gathering is the easiest and most win-win way to get food! You don’t have to worry about cultivating the land and raising livestock, you don’t have to risk getting your arse kicked by a hefty boar that doesn’t agree to be your dinner. The downside was that such tribes had to lead a nomadic lifestyle, constantly changing their place of residence, and this is not very convenient and not suitable for everyone. But we do not need to be nomadic, but to be able to find food in the wilderness is a very useful skill!

First of all – do not mindlessly eat everything you see on bushes and trees! Many berries are very poisonous and can send you to the Land of Eternal Hunting (you’re gonna kick the bucket). Let’s see how to tell the difference:
1. Color:
- Many toxic berries are brightly colored, often red, purple, blue, or black, but this is not always a guarantee. Some safe berries, like blueberries, can be blue, while toxic ones, like pokeweed berries, can be purple.
- Be cautious of berries that are too brightly colored or have an unnatural look. Generally, if you don’t recognize the berry or it looks suspicious, avoid eating it.
2. Shape and Size:
- Toxic berries often have a distinctive shape. For instance, yew berries are bright red and have a single seed inside.
- Safe berries, like raspberries and blackberries, have multiple smaller seeds inside.
3. Toxic Berries Common in North America:
Here are some examples of poisonous berries to avoid:
- Pokeweed (Phytolacca americana): Berries are dark purple to black and grow in clusters. The plant is highly toxic if consumed.
- Yew (Taxus species): Berries are red with a single seed inside. The leaves and seeds of the plant are toxic.
- Holly (Ilex species): Red berries. The berries are toxic to humans but are often eaten by birds.
- Deadly Nightshade (Belladonna): Glossy, black berries, very toxic and can be fatal.
- Mistletoe (Viscum album): White berries, and toxic when ingested.
4. Smell:
- If a berry has an unusual or off-putting smell, it’s best to avoid eating it. Some toxic berries have a strong, unpleasant odor.
5. Taste Test (Only When Certain):
- Never eat berries unless you are absolutely sure they are safe.
- As a last resort, some people recommend tasting a tiny amount of berry on the lip and waiting for an allergic reaction or irritation. However, this is risky, and it’s better to stick to identifying based on appearance.
6. Leaves and Plant Characteristics:
- Always check the leaves and overall appearance of the plant, as this can help with identification. For instance, poison ivy and poison oak plants have distinct leaves that indicate danger.
Shelter Building
You’ve made a fire, you’ve eaten, it’s time to build a shelter! For this you will need a survival knife, ingenuity and a little inspiration.
1. Choose the Right Location
- Avoid low-lying areas: These can collect water and increase the risk of flooding.
- Look for natural shelters: A cave, overhang, or dense tree cover can provide instant protection.
- Consider wind direction: Set your shelter up so the opening faces away from the wind, if possible.
- Safety first: Ensure you are not near dangerous wildlife, or under dead trees that could fall.
2. Types of Shelters
Tarp Shelter or Emergency Shelter
- If you have a tarp or large piece of plastic, tie it between trees to create a makeshift shelter. This works well for basic protection from rain or wind.
Lean-to Shelter
- Materials: Use long branches or poles as the frame, leaning them against a tree or creating a V-shape.
- Covering: Use leaves, branches, or pine boughs to cover the frame and keep rain out. The more layers, the better.
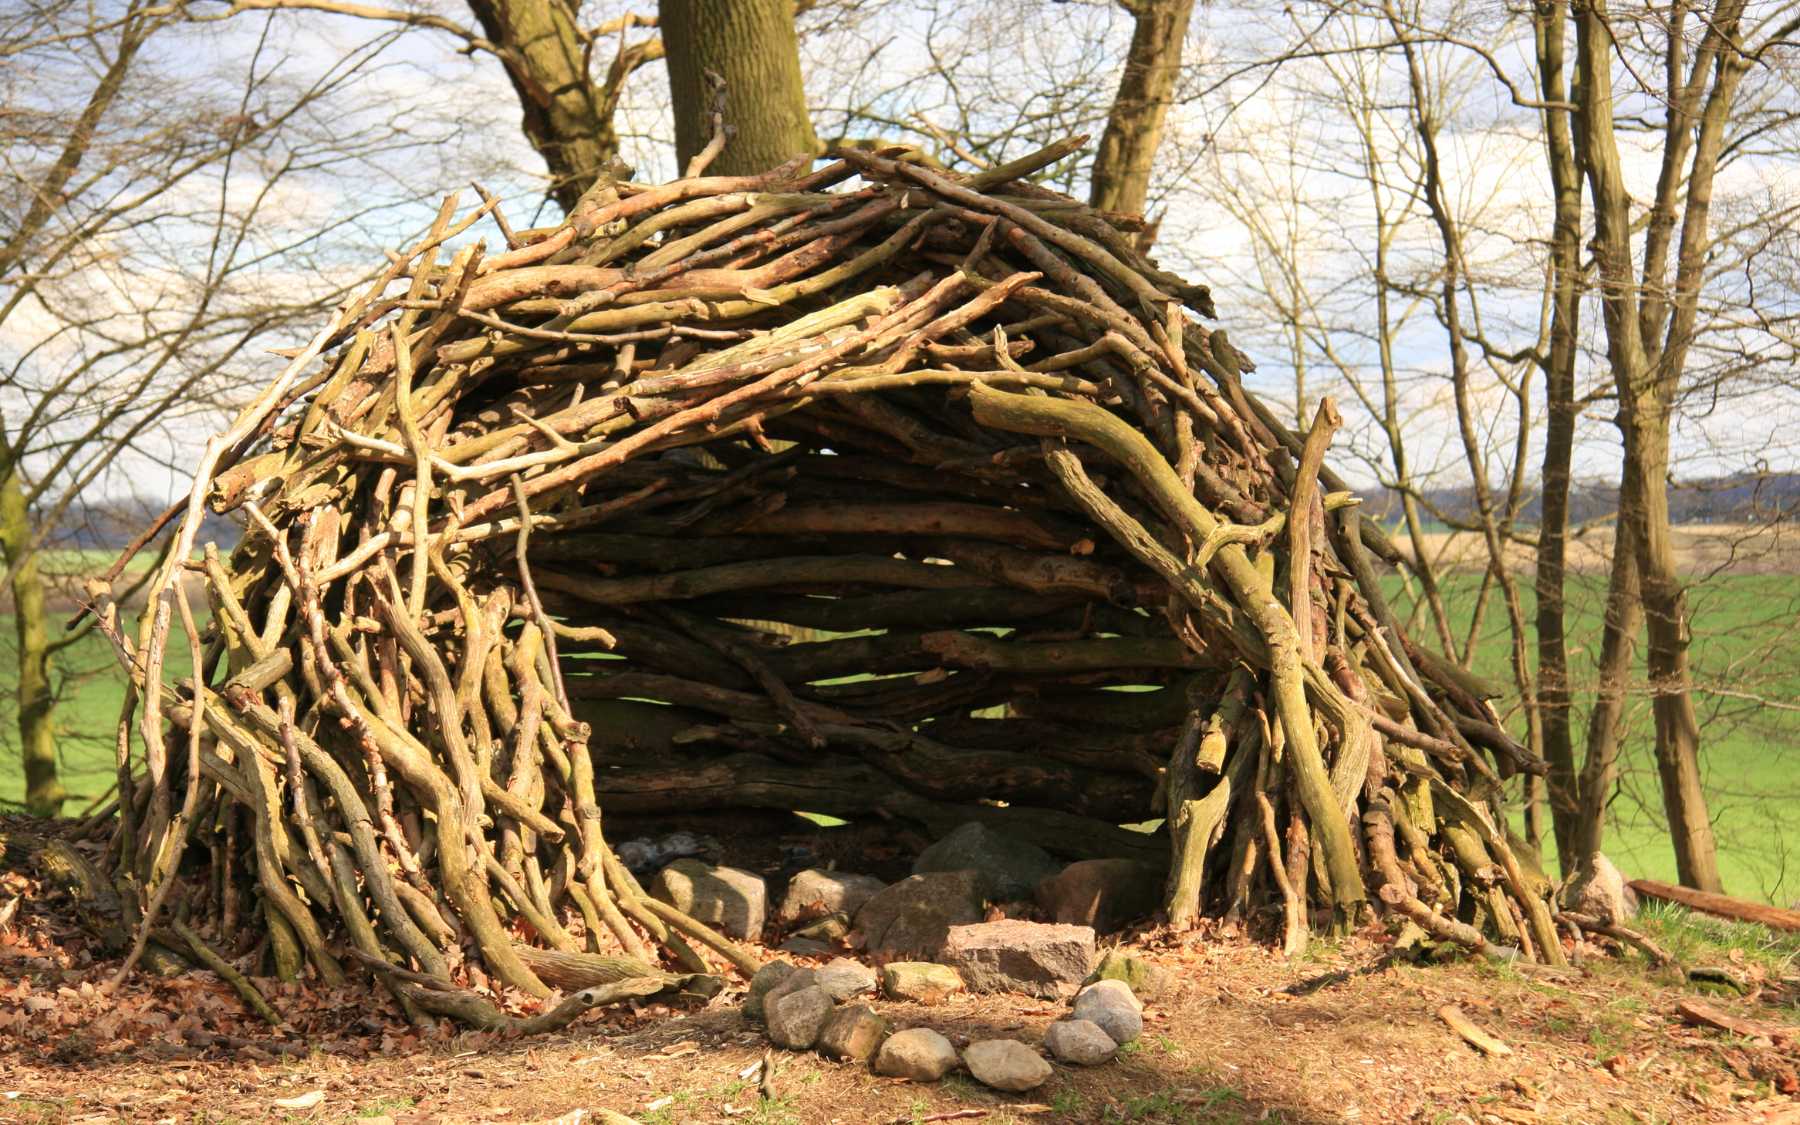
Debris Hut
- Materials: Gather leaves, branches, and grass.
- Construction: Create a frame from long sticks, then pile a thick layer of leaves, grass, and debris on top. The debris provides insulation and keeps you dry.
- Tip: Make sure to create a small entrance, and a roof slope to prevent water from collecting.
Snow Shelter (Quinzhee or Snow Cave)
- Quinzhee: If you’re in snowy conditions, a quinzhee is a great option. Pile up snow in a dome shape, then hollow it out, leaving thick walls for insulation.
- Snow Cave: Dig into the snow to create a cave-like structure, ensuring there’s enough room to sit or lie down.
A-Frame Shelter
- Use a ridge pole (a long stick or branch) supported between two trees, then cover it with leaves or branches to form a triangular frame. This is a great option for more permanent or larger shelters.
3. Building Techniques
Frame Construction:
- Use long, sturdy branches for the main frame. If you don’t have rope or cord, lash them together with vines, paracord, or even fabric.
Layering for Insulation:
- Insulation is key to warmth. Gather as many natural materials as possible—leaves, moss, grass, and evergreen boughs. Lay these materials in layers to trap heat and provide a barrier from the cold ground.
Roofing:
- For waterproofing, use overlapping materials. Start at the bottom with larger leaves and work upwards with smaller branches or pine needles. This layering will shed rain.
Fire-Resistant Areas:
- When placing a fire pit near your shelter, make sure it’s safe. The shelter should be built far enough away to avoid accidents, but near enough to stay warm.
4. Additional Tips
- Ground Insulation: Before you lay down, create an insulated bed by collecting dry leaves, grass, or moss to lie on. This will keep you off the cold, damp ground.
- Ventilation: Make sure your shelter has proper ventilation, especially in snow shelters or when you use fire. A lack of airflow can lead to suffocation or carbon monoxide poisoning.
- Use Natural Materials: Look for what’s around you (branches, rocks, leaves, moss). These can be used for creating walls, roofing, and flooring.
5. Improvised Shelters Without Tools
- Even without a knife or rope, you can improvise shelters with natural materials. Tie knots with vines, use stones to stabilize structures, or create roofs with large leaves.
- Make a lean-to by leaning branches against a tree or bush, and add layers of leaves or other materials for insulation.
6. Shelter Considerations in Different Environments
- Tropical/Warm Climate: Focus on shade and airflow to avoid overheating. Use palm fronds or large leaves to create roofs and walls for protection from sun and rain.
- Cold/Arctic Conditions: Insulate heavily and ensure the shelter is snowproof. Consider building a snow shelter or finding a sheltered rock formation.
7. Testing Your Shelter
- Once built, test your shelter by sitting or lying in it for a few minutes. Check for drafts, leaks, or discomfort. Make adjustments before nightfall.
Water Sourcing and Purication
Finding water is another survival challenge.
1. Water Sourcing
Water sourcing refers to the methods of obtaining water from natural or artificial reservoirs to be used for drinking, industrial use, agriculture, and other purposes. Common sources include:
Surface Water
- Rivers and Streams: Flowing bodies of water that are often the primary source of drinking water for many communities.
- Lakes and Reservoirs: Bodies of standing water where water can be stored and accessed for use.
Groundwater
- Wells: Water can be extracted from aquifers beneath the earth’s surface. Wells tap into underground reservoirs.
- Springs: Natural sources of groundwater that flow to the surface, often due to pressure or geological conditions.
Rainwater
- Rainwater Harvesting: Collecting rainwater from roofs or other surfaces and storing it for various uses.
Desalination (for coastal areas)
- Seawater Desalination: Removing salt and impurities from seawater to make it potable.
Recycled Water
- Wastewater Treatment Plants: Treated wastewater, which has been purified and cleaned, is reused for various purposes.
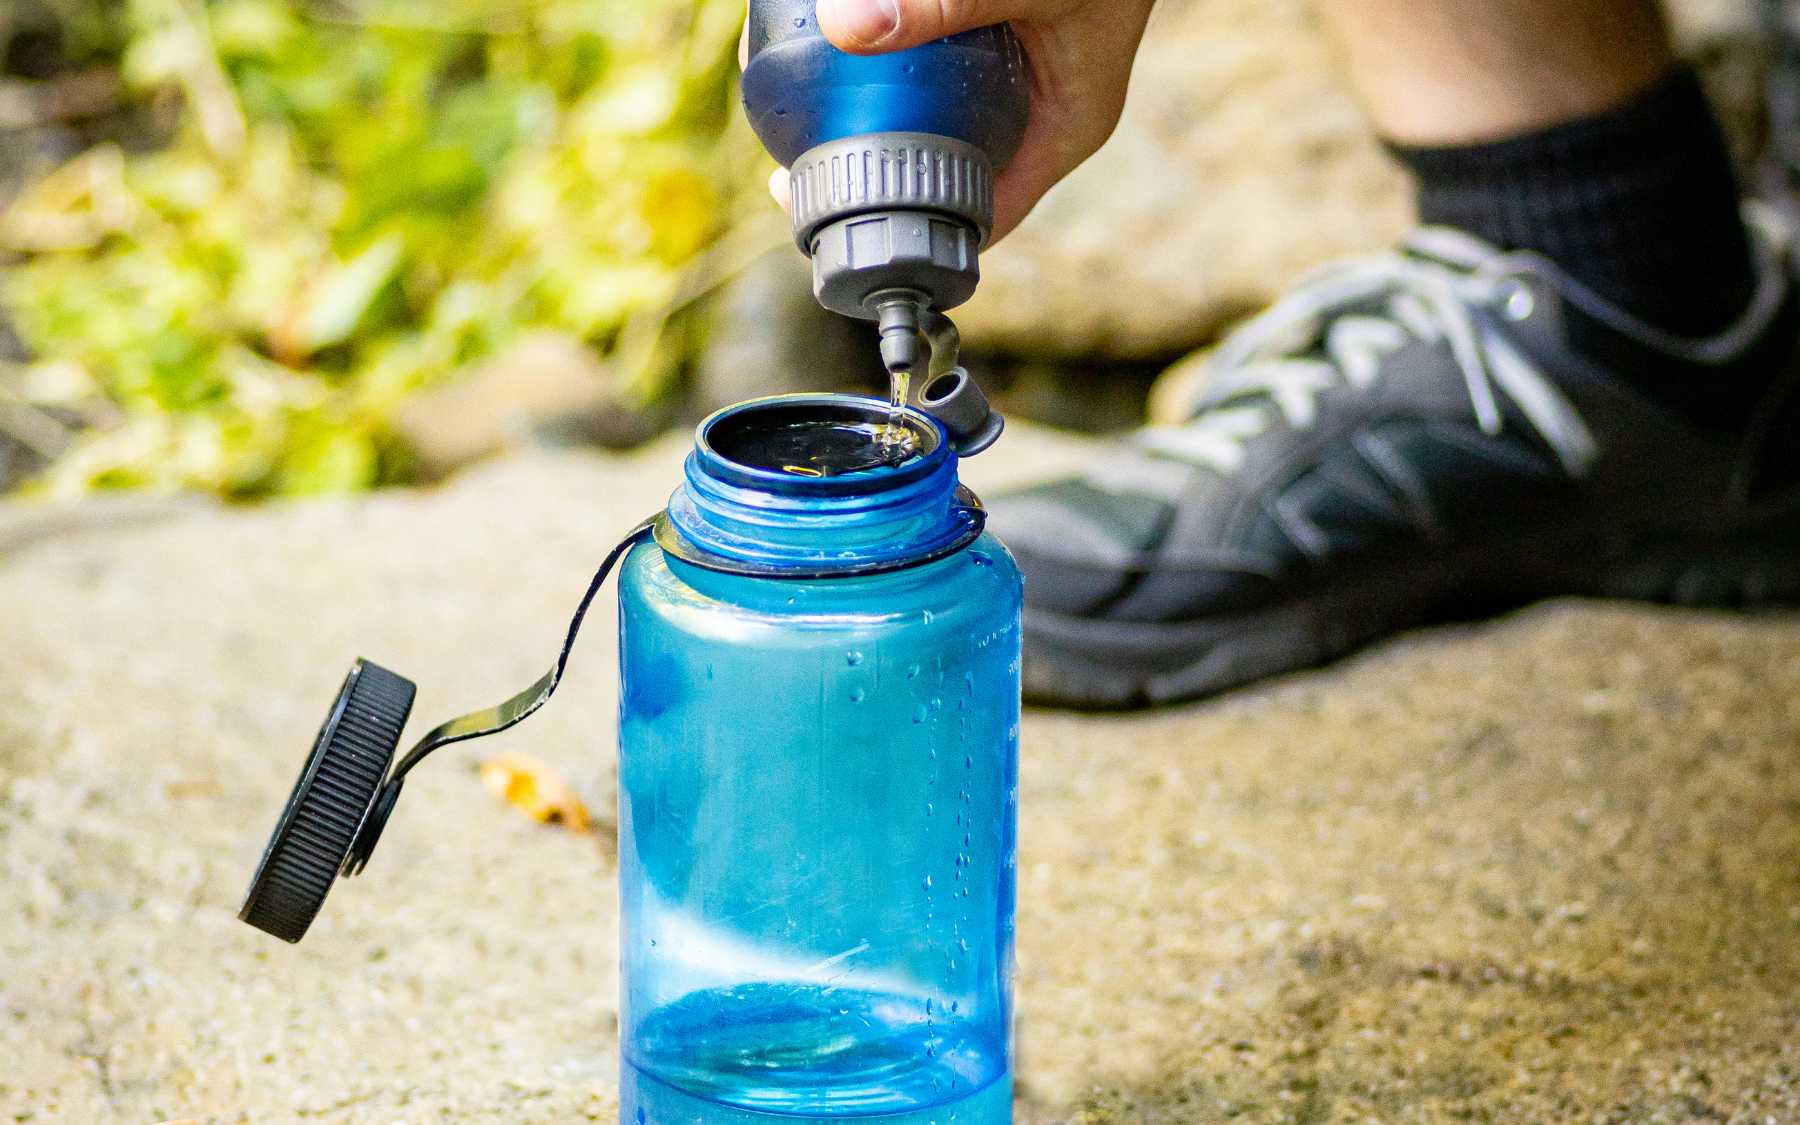
2. Water Purification
But it’s not enough to find the water, it’s important to disinfect it! Because this water can contain everything from E. coli to plague.
Boiling
Effectiveness: Boiling is one of the most reliable methods for purifying water. It kills bacteria, viruses, and parasites.
- How to do it: Bring water to a rolling boil for at least 1 minute (3 minutes if you’re at higher elevations). Let it cool before drinking.
- Pros: Simple, no special equipment needed.
- Cons: Requires a heat source, and fuel can be limited in some environments.
2. Sedimentation and Filtration (for cloudy or muddy water)
Effectiveness: When water is cloudy or contains suspended particles, settling and filtering the water first helps remove sediment before purifying it.
- How to do it: Allow the water to settle for 30-60 minutes. Once the sediment has settled, filter the water through a cloth or improvised filter (e.g., sand, charcoal, and gravel) before purifying by boiling, filtering, or using chemicals.
- Pros: Helps clarify the water before using other methods.
- Cons: Only removes large particles; pathogens still need to be treated.
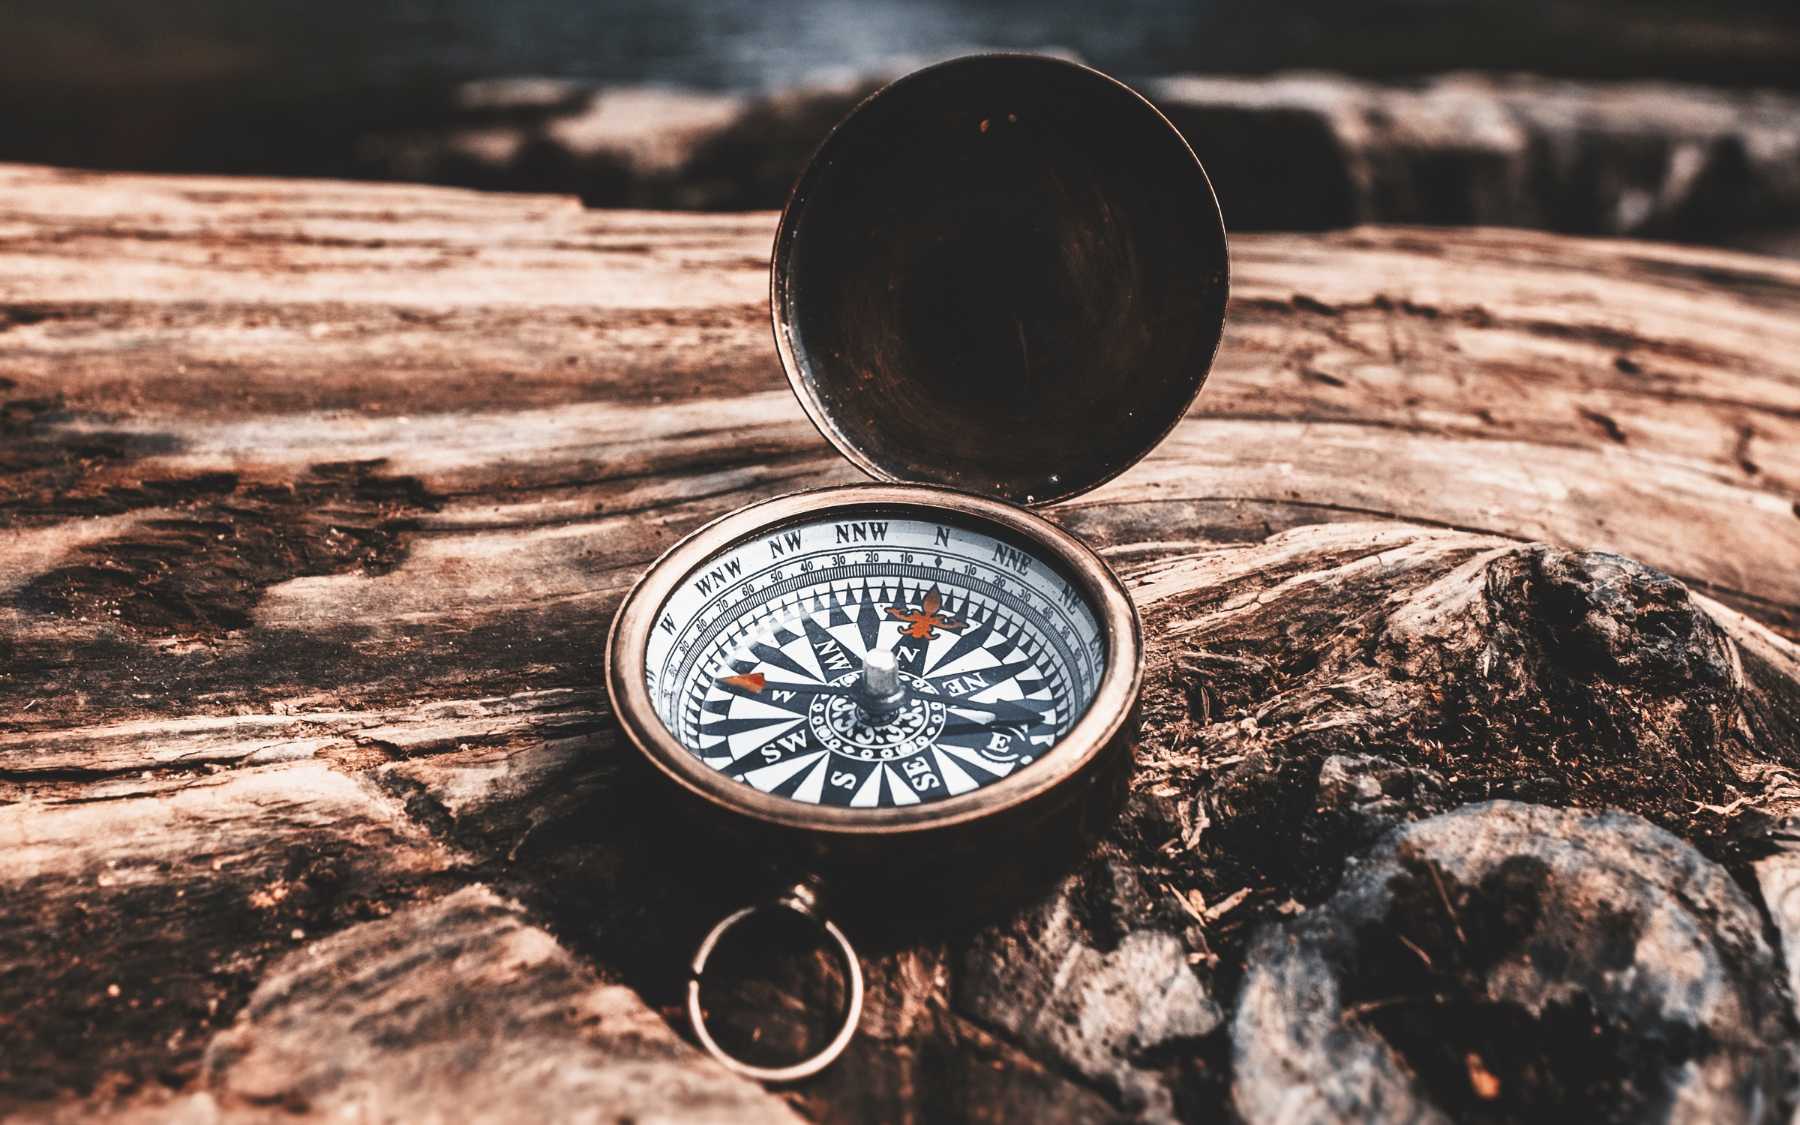
Navigation Without Modern Tools
There are times when you don’t have a phone or a map handy, but you want to live SO MUCH!
Using Celestial Navigation
Celestial navigation is the practice of using the stars, moon, sun, and other celestial bodies to determine your position on Earth. This method has been used for thousands of years, especially by sailors and explorers.
- The Sun: The position of the sun in the sky can help determine your latitude. The most common method involves measuring the angle between the horizon and the sun using a sextant or similar instrument. This is called the solar angle. By knowing the time of day and the sun’s position, navigators can calculate their latitude.
- The Stars: At night, sailors often relied on the stars to guide them. The most famous star used in celestial navigation is Polaris, the North Star. Its position in the sky indicates true north in the Northern Hemisphere. Navigators also used constellations like the Big Dipper to find Polaris and determine direction.
- The Moon: The moon also provides a useful reference for navigation. Its position and phase can be tracked to estimate longitude, though this is a more complicated process that requires accurate timekeeping.
- The Horizon: Celestial navigation also involved observing the horizon, particularly the rising and setting of the sun or stars. These events can help with determining directions (east, west) and time.
Natural Landmarks and Signs
Landmarks like mountains, rivers, and coastlines have been used for navigation for millennia. In many regions, specific landmarks are easily identifiable and provide a natural reference for travel. Some ways to use landmarks in navigation include:
- Distinctive Mountains and Peaks: Mountains, hills, or specific rock formations are often visible from great distances. Travelers would recognize unique peaks and know that they were either heading toward or away from them.
- Rivers and Waterways: Rivers often serve as natural highways, and their flow is predictable. Knowing where a river leads or where it originates can help travelers orient themselves. In addition, rivers may have distinctive features such as waterfalls or islands that help with orientation.
- Coastal Navigation: Seafarers would follow the coastline, using specific features like bays, headlands, and lighthouses to stay on course. Landmarks like cliffs, rock formations, or coves were critical for navigating along shorelines.
- Prominent Structures or Trails: In more settled regions, man-made landmarks like towers, churches, or castles were important for navigation. Similarly, well-traveled paths or roads would offer cues on direction and progress.
Natural Signs and Indicators
Nature itself offers a range of signs that humans have learned to read for navigation.
- Wind Patterns: In some parts of the world, wind patterns are consistent and predictable. Mariners would understand prevailing winds (such as the trade winds) and use them to navigate across the ocean. On land, wind direction can help travelers figure out which way they are heading, especially in areas where wind blows consistently from one direction.
- Animal Behavior: Some animals are great indicators of direction. Birds, for example, often migrate in predictable patterns, and some species are known to fly towards certain landmarks or geographic features. Similarly, animals’ movements or sounds could indicate proximity to water or shelter.
- Plant Life: Vegetation can also reveal important information. In forests, for example, certain plants grow at particular elevations or directions (such as moss growing on the north side of trees in the Northern Hemisphere). Farmers and travelers also use specific plants to gauge climate, weather, and direction.
- Sunrise and Sunset: In addition to using the sun’s angle, knowing the times of sunrise and sunset can give direction clues. The sun rises in the east and sets in the west, so observing the sunrise or sunset gives an indication of where you are headed.
- Ocean Currents: Mariners who sailed across oceans would study prevailing ocean currents, which move in specific patterns. These currents can indicate geographic locations and help sailors navigate, especially when combined with wind patterns and celestial cues.
Conclusion
As you can see, good ol’ classics are always relevant and do not get out of date! Arm yourself with the knowledge and experience of our ancient ancestors and conquer the wilderness. Adventures await!